Machine Vision System Parameters Explained
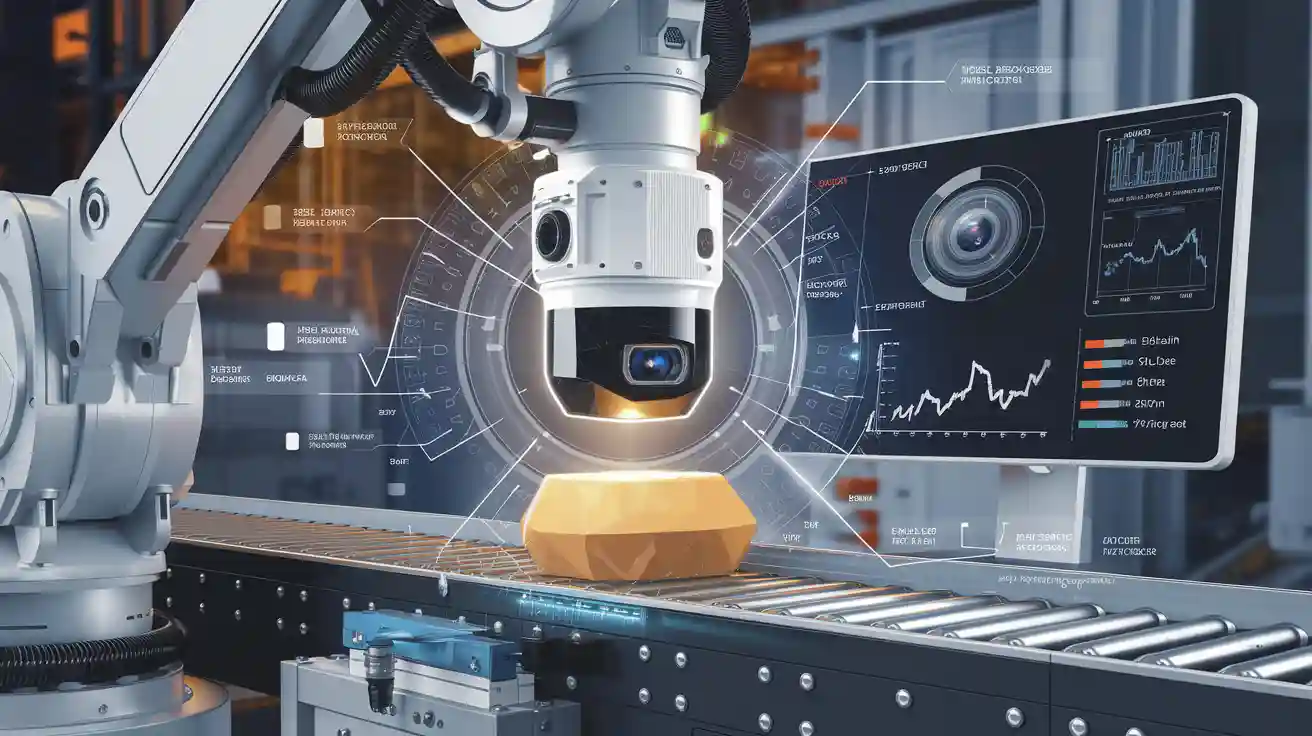
Understanding the parameters of a machine vision system is essential for achieving accurate and efficient results. The parameters machine vision system relies on define how it interprets visual data, ensuring precise measurements and reliable outputs. For instance, metrics like accuracy, precision, recall, and F1 score are crucial for evaluating performance. Accuracy measures overall correctness, while precision focuses on the reliability of positive predictions. Recall assesses the system’s ability to identify specific instances, and the F1 score balances precision and recall. By mastering these parameters, you can optimize a machine vision system for tasks like defect detection, object tracking, and quality control.
Key Takeaways
- Learn key terms like accuracy, precision, recall, and F1 score to make machine vision systems work better.
- Know how world, camera, image, and pixel systems connect to improve calibration and accuracy.
- Check and adjust internal and external settings often for better measurements and system performance.
- Pick the right lighting and resolution to get clear images and find defects correctly.
- Keep testing and tweaking your machine vision system to handle changes and stay efficient.
Coordinate Systems in Machine Vision

Understanding coordinate systems is essential for working with machine vision systems. These systems rely on different coordinate frameworks to map the real world into digital data. Let’s explore three key coordinate systems: the world coordinate system, the camera coordinate system, and the image coordinate system.
World Coordinate System
The world coordinate system represents the physical environment where objects exist. It uses a fixed reference point, often called the origin, to define the position of objects in three-dimensional space. For example, in an industrial setting, this system might map the location of parts on a conveyor belt. You can think of it as the "real-world" framework that connects the machine vision system to its surroundings.
Camera Coordinate System
The camera coordinate system is tied to the camera itself. It defines the position of objects relative to the camera's lens. When light from an object enters the camera, this system determines how the object’s location is interpreted. The camera coordinate system is crucial for translating the physical world into a format the camera can process. For instance, if you move the camera, the coordinates of the objects will change within this system, even though their positions in the world coordinate system remain the same.
Image Coordinate System
The image coordinate system comes into play after the camera captures an image. It maps the two-dimensional representation of the scene onto the camera’s sensor. This system uses pixel values to define the position of points in the image. For example, if you’re analyzing an image for defect detection, the image coordinate system helps pinpoint the exact pixel where the defect appears. Unlike the camera coordinate system, this framework works entirely in two dimensions.
Tip: Understanding how these coordinate systems interact can help you calibrate your machine vision system for better accuracy.
Pixel Coordinate System
The pixel coordinate system is the final stage in mapping visual data. It represents the position of each pixel in an image using a two-dimensional grid. The origin of this system is located at the bottom-left corner of the image plane. Each pixel is assigned a unique coordinate based on its row and column position in the array. This system is essential for tasks like creating a depth map, where pixel values indicate the distance of objects from the camera.
You use the pixel coordinate system to analyze specific areas within an image. For example, when detecting defects on a product, you can pinpoint the exact pixel coordinates where the issue occurs. This precision allows you to focus on problem areas without scanning the entire image. The pixel coordinate system works seamlessly with other coordinate systems to ensure accurate mapping from the real world to the digital domain.
Relationships Between Coordinate Systems
Understanding the relationships between coordinate systems is crucial for calibrating machine vision systems. Each system plays a unique role, but they work together to translate real-world objects into digital data. The world coordinate system provides an absolute reference for objects in three-dimensional space. The camera coordinate system interprets these objects relative to the camera's position. The image coordinate system maps the scene onto the camera sensor, while the pixel coordinate system breaks it down into individual pixels.
These systems interact to create a depth map, which helps you measure distances and identify object positions. For example, the camera coordinate system calculates the depth of objects based on their distance from the camera. This information is then translated into pixel coordinates, allowing you to visualize depth in a two-dimensional image.
Here’s a table summarizing the key differences among these coordinate systems:
| Coordinate System | Description |
|---|---|
| World Coordinate System | Absolute coordinate system of the 3D world, also known as the object coordinate system. |
| Camera Coordinate System | 3D coordinate system with the camera optical center as the origin, aligned with the camera's optical axis. |
| Image Coordinate System | 2D coordinate system in the image plane, with the origin at the intersection of the Z-axis and image sensor. |
| Pixel Coordinate System | 2D coordinate system with the bottom-left corner of the image plane as the origin, representing pixel positions in an array. |
By understanding these relationships, you can optimize your machine vision system for tasks like object tracking and defect detection. Calibration ensures that data flows smoothly between coordinate systems, improving accuracy and efficiency.
Intrinsic and Extrinsic Parameters in Machine Vision
Understanding intrinsic and extrinsic parameters is essential for optimizing a machine vision system. These parameters define how a camera perceives the world and interact with its environment. By mastering these concepts, you can enhance the accuracy of tasks like object detection, 3D mapping, and quality inspection.
Intrinsic Parameters
Intrinsic parameters are the internal characteristics of a camera that influence how it captures images. These parameters remain constant for a specific camera and include details like focal length, optical center, and lens distortion. They define the relationship between the 3D world and the 2D image captured by the camera sensor.
For example, the focal length determines how much of the scene the camera can capture. A longer focal length narrows the field of view, while a shorter one widens it. The optical center, often referred to as the principal point, is the point where light rays converge on the camera sensor. Lens distortion, on the other hand, affects the shape of objects in the image, causing them to appear curved or stretched.
Note: Intrinsic parameters serve as the foundation for camera calibration. Without accurate intrinsic calibration, the machine vision system cannot reliably interpret spatial relationships.
Key Intrinsic Parameters
Several key intrinsic parameters directly impact image quality and system performance. These include:
- Focal Length: Determines the magnification and field of view.
- Optical Center: Defines the point where the optical axis intersects the image plane.
- Lens Distortion Coefficients: Corrects for barrel or pincushion distortion.
- Pixel Aspect Ratio: Ensures uniform scaling of the image along both axes.
To illustrate the importance of intrinsic parameters, consider the following experimental data:
| Evidence Description | Details |
|---|---|
| Calibration Method | Intrinsic calibration of a 5.4 MP Lucid Vision Labs camera using a planar checkerboard with 292 poses. |
| Validation Technique | Projected point cloud from a 3D LiDAR sensor to verify accuracy of intrinsic parameters for 3D applications. |
| Importance of Intrinsic Parameters | Accurate intrinsic parameters are essential for the extrinsic calibration of sensors like LiDARs and cameras, as they reduce projection errors in 3D feature estimation. |
These parameters also enhance image quality by improving metrics like sharpness, noise reduction, and color accuracy. For instance:
- Sharpness: Improves the clarity of edges and fine details.
- Noise: Reduces unwanted variations in brightness or color.
- Color Accuracy: Ensures the colors in the image match the real-world scene.
- Dynamic Range: Captures a wider range of light intensities, from shadows to highlights.
Extrinsic Parameters
Extrinsic parameters define the spatial relationship between the camera and the objects in its environment. Unlike intrinsic parameters, extrinsic parameters depend on the camera's position and orientation in the world. They include rotation and translation matrices, which describe how the camera is angled and where it is located relative to the scene.
For example, if you mount a camera on a robotic arm, the extrinsic parameters will change as the arm moves. These parameters are crucial for applications like 3D reconstruction, where the system needs to understand the depth and position of objects.
Extrinsic parameters are often calibrated using techniques like rotation differences and vertical direction constraints. These methods ensure that the camera's perspective aligns accurately with the real-world scene. The table below highlights some common calibration methods:
| Calibration Method | Description |
|---|---|
| Rotation Differences | Minimizes matching error of rotation matrices between visual and inertial systems. |
| Vertical Direction Constraint | Uses gravity and vertical line measurements as a reference for calibration. |
| Filtering/Optimization | Estimates extrinsic parameters using methods like EKF and optimization techniques. |
By combining intrinsic and extrinsic parameters, you can achieve precise camera calibration. This process ensures that the machine vision system accurately maps the 3D world onto a 2D image, enabling reliable measurements and analysis.
Key Extrinsic Parameters
Extrinsic parameters describe the camera's position and orientation in relation to the objects it observes. These parameters include rotation and translation matrices, which define how the camera is angled and where it is located in the physical world. You use these parameters to align the camera's perspective with the real-world scene, ensuring accurate measurements and spatial consistency.
Calibration of extrinsic parameters is essential for applications like 3D reconstruction and robotic vision. For example, when a camera is mounted on a moving robotic arm, its extrinsic parameters change as the arm moves. To maintain accuracy, you must recalibrate the system to account for these changes.
Several advanced techniques improve the calibration process:
- Bayesian Inference-Based Approach: This method evaluates uncertainties during calibration, ensuring system consistency. It provides more accurate predictions of image points compared to traditional methods.
- Optimization Procedures: Adjusting the camera’s exterior orientation enhances the precision of spatial measurements.
These techniques highlight the importance of extrinsic parameters in achieving reliable results. By refining calibration methods, you can minimize errors and improve the system's overall performance.
How They Work Together
Intrinsic and extrinsic parameters complement each other to create a cohesive machine vision system. Intrinsic parameters define the camera's internal characteristics, such as focal length and lens distortion. Extrinsic parameters, on the other hand, describe the camera's external relationship with the environment. Together, they enable the system to accurately map the 3D world onto a 2D image.
When intrinsic and extrinsic parameters work in harmony, they enhance the system's ability to interpret spatial relationships. For instance, optimizing intrinsic parameters reduces distortion, while calibrating extrinsic parameters ensures the camera's perspective aligns with the scene. This synergy improves tasks like object tracking, depth mapping, and quality inspection.
Case studies illustrate the benefits of this collaboration. One study simulated finger flexion movements to analyze muscle interactions. It showed how different muscles worked together to generate power during flexion with resistance. Similarly, intrinsic and extrinsic parameters interact to produce accurate measurements in machine vision systems. By calibrating both sets of parameters, you can achieve consistent results across various applications.
Tip: Regular calibration of intrinsic and extrinsic parameters ensures your machine vision system remains accurate and reliable, even in dynamic environments.
Machine Vision Optics and Key Optical Parameters
Understanding machine vision optics is crucial for designing systems that deliver accurate and reliable results. Optical parameters like field of view, working distance, and resolution determine how well your system captures and interprets visual data. Let’s explore these parameters in detail.
Field of View
The field of view (FOV) defines the observable area that the camera can capture. It plays a critical role in determining how much of the scene is visible in a single frame. FOV is typically measured in three dimensions: horizontal, vertical, and diagonal. Each type serves a specific purpose in machine vision applications.
| Type of Field of View | Description | Application |
|---|---|---|
| Horizontal FOV | Measures the width of the observable area. | Ideal for wide coverage tasks like conveyor belt inspections. |
| Vertical FOV | Measures the height of the observable area. | Essential for inspecting tall objects or vertical surfaces. |
| Diagonal FOV | Measures the longest dimension of the observable area. | Provides a comprehensive view of the scene. |
For example, if you’re inspecting objects on a conveyor belt, a wide horizontal FOV ensures you capture the entire width of the belt. On the other hand, a vertical FOV is better suited for analyzing tall objects like bottles or cans. Selecting the right FOV ensures your machine vision system captures all necessary details without wasting resources on unnecessary areas.
Tip: Always match the FOV to your application’s requirements. A mismatch can lead to incomplete data or inefficient processing.
Working Distance
Working distance refers to the space between the camera lens and the object being observed. This parameter affects both the clarity of the image and the system’s ability to focus on the target. A shorter working distance allows for higher magnification, which is ideal for inspecting small details. However, it also reduces the depth of field, making it harder to keep objects at varying distances in focus.
For instance, in a machine vision system designed for quality control, you might need a short working distance to detect fine defects on a product. Conversely, a longer working distance is better for applications requiring a broader view, such as monitoring large assembly lines.
When setting the working distance, consider the physical constraints of your setup. Ensure there’s enough space for the camera and lighting equipment without compromising image quality. Proper calibration of the working distance enhances the system’s performance and ensures consistent results.
Note: Adjusting the working distance may also impact other parameters like FOV and resolution. Always test your setup to find the optimal balance.
Resolution
Resolution measures the level of detail your camera can capture. It’s expressed in terms of the number of pixels in the camera sensor, often in megapixels. Higher resolution provides more detail, making it essential for tasks like defect detection and precision measurement. However, it may also increase processing time and storage requirements.
- Cameras with higher resolution sensors capture more light-sensitive pixels. This improves granularity, which is crucial for applications requiring detailed analysis.
- Lower resolution sensors work well for less detail-oriented tasks, offering faster frame rates and reduced data processing demands.
To illustrate, consider a scenario where you need to detect defects as small as 0.25 mm within a 20 mm FOV. The camera must achieve a resolution of 4 pixels per 0.25 mm, translating to 16 pixels per 1 mm across the FOV. This requires a minimum sensor array of 320 x 320 pixels. Choosing the right resolution ensures your system captures the necessary details without overloading your processing capabilities.
Tip: Balance resolution with your system’s processing power. High resolution is beneficial, but only if your hardware can handle the increased data load.
Depth of Field
Depth of field (DOF) refers to the range within a scene where objects appear sharp and in focus. It plays a critical role in machine vision systems, especially when inspecting objects at varying distances. A shallow depth of field focuses on a narrow range, making it ideal for highlighting specific details. A deeper depth of field ensures that multiple objects at different distances remain sharp.
Several factors influence the depth of field in your system:
- Aperture Size: A smaller aperture increases the depth of field, while a larger aperture reduces it.
- Focal Length: Longer focal lengths create a shallower depth of field.
- Working Distance: Increasing the distance between the camera and the object expands the depth of field.
For example, if you’re inspecting a flat surface for defects, a shallow depth of field works well. However, for 3D objects or scenes with varying heights, a deeper depth of field ensures all areas remain in focus. Adjusting the depth of field to match your application improves accuracy and reduces errors.
Tip: Use a smaller aperture and increase the working distance to maximize the depth of field. This approach is particularly useful for applications requiring consistent focus across multiple planes.
Sensor Size
Sensor size determines how much light the camera sensor captures, directly affecting image quality and field of view. Larger sensors collect more light, improving performance in low-light conditions and enhancing dynamic range. Smaller sensors, while more compact, may struggle in challenging lighting environments.
The relationship between sensor size, resolution, and pixel size is crucial. Larger sensors with higher resolution and appropriately sized pixels provide better image clarity. For instance, consider the following specifications:
| Sensor Type | Resolution | Sensor Size (Diagonal) | Pixel Size |
|---|---|---|---|
| CMOS | 1600 × 1200 pixels | 9 mm | 4.5 × 4.5 μm sq. |
This CMOS sensor offers a balance between resolution and pixel size, making it suitable for applications requiring high accuracy under variable conditions. A larger sensor size ensures a wider field of view, while the pixel size maintains sharpness and detail.
When selecting a sensor, consider your application’s requirements. For tasks like defect detection, a larger sensor with higher resolution ensures you capture fine details. For simpler tasks, a smaller sensor may suffice.
Note: Matching the sensor size to your lens and application ensures optimal performance. Misalignment can lead to vignetting or reduced image quality.
Primary Magnification
Primary magnification measures how much the camera enlarges the object being observed. It’s calculated as the ratio of the sensor size to the field of view. Higher magnification provides more detail but reduces the field of view, while lower magnification captures a broader area with less detail.
For example, if your sensor size is 10 mm and your field of view is 50 mm, the primary magnification is 0.2×. This means the object appears 20% of its actual size on the sensor. Adjusting magnification helps you balance detail and coverage based on your application.
- High Magnification: Ideal for inspecting small components or detecting minute defects.
- Low Magnification: Suitable for monitoring larger areas, such as conveyor belts or assembly lines.
To achieve the desired magnification, you can adjust the lens or change the working distance. Always ensure the magnification aligns with your resolution and depth of field requirements for optimal results.
Tip: Test different magnification levels during setup to find the best balance between detail and coverage for your specific task.
Lighting Parameters in Machine Vision Systems
Lighting plays a pivotal role in the performance of machine vision systems. Proper lighting ensures that the system captures accurate and detailed images, which are essential for tasks like defect detection and object recognition. Let’s explore key lighting parameters that influence these systems.
Illuminance and Luminance
Illuminance refers to the amount of light falling on a surface, while luminance measures the light reflected or emitted from that surface. Both parameters directly impact image quality. For instance, insufficient illuminance can result in dark, unclear images, while excessive luminance may cause glare or overexposure.
The importance of these parameters becomes evident when considering their role in enhancing image contrast and detail. Proper lighting configurations ensure consistent illumination, which is critical for capturing all necessary details. Missing information due to poor lighting complicates measurements and reduces accuracy. Additionally, the interaction of light with the target’s surface and its wavelength significantly affects the image captured by the camera.
| Evidence | Description |
|---|---|
| Image Contrast Enhancement | Key concepts such as geometry, structure, wavelength, and filters are essential for understanding how lighting affects image quality in machine vision. |
| Influence of Light | The way light interacts with the target, including its wavelength and the surface nature, significantly affects the image produced by the camera. |
| Role of Lighting | Proper lighting configurations are essential for achieving optimal results in vision systems, as faulty lighting cannot be compensated by other components. |
| Consistent Illumination | The correct lighting arrangement is crucial for capturing all necessary details in machine vision, as missing information due to incorrect illumination complicates measurements. |
Tip: Use consistent lighting to avoid shadows or reflections that can distort the image.
Contrast and Color
Contrast and color are equally important for machine vision systems. Contrast determines the difference between light and dark areas in an image, making it easier to identify edges and features. Color, on the other hand, provides additional information about the object, such as material type or surface condition.
Studies show that color differences significantly affect machine vision performance. For example, datasets like CIFAR10-F and CIFAR100-F reveal how variations in color contrast influence model accuracy. These studies also highlight the importance of data augmentation and model architecture in improving system performance.
| Aspect | Description |
|---|---|
| Study Focus | Investigates the impact of color differences on machine vision performance. |
| Datasets Used | CIFAR10-F, CIFAR100-F, CIFAR10-B, CIFAR100-B, and CIFAR-CoCo for analyzing color contrast effects. |
| Methodology | Framework developed to evaluate model performance across different architectures and tasks. |
| Key Findings | Color differences significantly affect model perception and performance in machine vision systems. |
| Additional Analysis | Explores model architecture, size, task complexity, and data augmentation in relation to color contrast. |
Note: Adjust lighting to enhance contrast and highlight color differences for better object detection.
Directionality of Light
The direction of light affects how shadows and highlights appear in an image. Directional lighting, such as from a spotlight, creates sharp shadows that emphasize surface textures. Diffused lighting, on the other hand, reduces shadows and provides uniform illumination, which is ideal for inspecting flat surfaces.
Advanced systems like the neuromorphic exposure control (NEC) system address challenges related to illumination changes. Inspired by biological principles, NEC improves performance by managing saturation issues. This approach enhances the robustness of machine vision applications in fields like autonomous driving and mixed reality.
Tip: Experiment with different lighting angles to find the best setup for your application.
Coherency of Light
Coherency of light refers to how well the light waves align in phase and direction. This property significantly affects the performance of machine vision systems, especially in applications requiring precise measurements or high-resolution imaging. You can think of coherent light as a synchronized team, where every wave moves in harmony. In contrast, incoherent light behaves more like a crowd, with waves moving randomly.
High coherence is essential for tasks like time-domain diffuse correlation spectroscopy (TD-DCS). However, certain lasers used in these applications, such as near-infrared lasers, have limited coherence lengths. This limitation can lead to errors in measurements. The table below highlights key findings from scientific assessments of light coherence:
| Aspect | Findings |
|---|---|
| Coherence Length | High coherence length is ideal for TD-DCS, but near-infrared lasers have limited coherence lengths. |
| IRF Effects | IRF broadening increases quantification errors and inconsistencies in measured data. |
| Laser Performance | LDH-P-C-N-760 diode lasers are less affected by IRF broadening, while Ti:Sapphire lasers show high correlation but are influenced by IRF effects. |
| Clinical Application | Optimization is needed for clinical use, considering photon-counting efficiency and other parameters. |
In some cases, reducing optical coherence can improve system performance. For example:
- Lower coherence enhances photonic computing systems by improving scalability and parallelism.
- This approach maintains accuracy while allowing for more efficient processing.
When designing a machine vision system, you must carefully consider the level of light coherence. High coherence works well for applications requiring precision, such as 3D imaging. Lower coherence may be better for tasks involving broader coverage or faster processing. By understanding and optimizing light coherence, you can enhance the accuracy and efficiency of your system.
Tip: Experiment with different light sources to find the optimal coherence level for your specific application.
Practical Applications and Common Pitfalls
Real-World Applications
Machine vision has transformed industries by automating tasks that require precision and speed. In the food industry, for example, machine vision systems inspect products for defects, ensuring quality and safety. Reports show that sales of application-specific machine vision systems in the North American food market reached 65 million dollars in 1995. This technology is also used in over 20 applications within the natural product industry, making it one of the top ten industries benefiting from machine vision.
In manufacturing, machine vision systems excel at tasks like assembly verification and defect detection. Cameras capture high-resolution images to identify missing components or surface flaws. These systems also play a critical role in robotics, guiding robotic arms with precision during assembly or packaging. In healthcare, machine vision aids in diagnostics. For instance, algorithms like the Adam optimizer have achieved 97.30% accuracy in skin cancer detection and 99.07% accuracy in analyzing COVIDx CT images.
Common Mistakes
Despite its advantages, machine vision systems can fail due to common design errors. Poor lighting is a frequent issue, leading to inconsistent image quality. Misaligned cameras or incorrect calibration can also cause inaccuracies. Dynamic testing often reveals errors introduced by automation or part handling, which are more significant than those found in static tests. Ignoring these factors can compromise the system’s reliability.
A study highlights the importance of addressing these pitfalls. Metrics like clDice and sensitivity reveal that errors in machine vision design are identifiable and fixable. For instance, sensitivity metrics showed a mean of 962,000 hits, emphasizing the need for precise calibration and testing.
Optimization Tips
To optimize your machine vision system, focus on fine-tuning both hardware and software components. Use advanced optimization techniques like Adaptive Moment Estimation and Root Mean Square Propagation to enhance model performance. Static testing helps assess the system’s fundamental measurement capabilities, while dynamic testing identifies errors in real-world conditions.
Additionally, ensure proper alignment of cameras and consistent lighting. Experiment with different algorithms, such as Stochastic Gradient Descent, to improve accuracy. For industrial applications, these strategies have proven effective, significantly boosting performance metrics.
Tip: Regularly test and recalibrate your system to maintain accuracy and adapt to changing conditions.
Understanding the parameters machine vision system is essential for building reliable and efficient solutions. These parameters directly influence system accuracy, productivity, and quality control. For example, machine vision systems excel in defect detection, operate continuously to enhance production speed, and automate quality assurance for consistent evaluations. The table below summarizes their overall impact:
| Impact Area | Description |
|---|---|
| Increased Accuracy and Precision | Machine vision systems excel in defect detection and measurement, ensuring high product quality. |
| Enhanced Productivity and Speed | These systems operate continuously, processing items at high speeds, thus improving production efficiency. |
| Improved Quality Control | Automation of quality assurance processes leads to consistent evaluations and traceability. |
| Real-Time Decision-Making | Instant feedback allows for immediate corrective actions, enhancing overall operational responsiveness. |
To optimize your system, focus on calibration and lighting. Calibration ensures accurate object detection and positioning. Regular routines using tools like calibration grids maintain precision. Proper lighting enhances image capture, especially in challenging environments. Integrating 3D vision technologies further improves accuracy by capturing depth information. These actionable steps ensure your machine vision system performs reliably across diverse applications.
Tip: Prioritize calibration and lighting adjustments during setup to minimize errors and maximize efficiency.
FAQ
What is the most important parameter in a machine vision system?
The most important parameter depends on your application. For example, resolution is critical for defect detection, while lighting parameters are essential for consistent image quality. Always prioritize the parameter that directly impacts your specific task.
How do you calibrate a machine vision system?
You calibrate a system by aligning its intrinsic and extrinsic parameters. Use tools like checkerboards or calibration grids to adjust the camera’s settings. Regular calibration ensures accurate measurements and reliable performance.
Why is lighting so crucial in machine vision?
Lighting determines how well the system captures details. Poor lighting can cause shadows, glare, or low contrast, leading to errors. Proper lighting enhances image clarity and ensures accurate analysis.
Can machine vision systems work in low-light environments?
Yes, but you need to optimize the system. Use cameras with larger sensors or higher sensitivity. Add external lighting sources to improve visibility and maintain image quality.
How do you choose the right lens for a machine vision system?
Select a lens based on your field of view, working distance, and resolution needs. A high-magnification lens works for small objects, while a wide-angle lens suits larger areas. Test different options to find the best fit.
Tip: Regularly review your system’s parameters to adapt to changing requirements and maintain optimal performance.
See Also
Understanding Image Processing Within Machine Vision Systems
The Role of Cameras in Machine Vision Technology
An Overview of Computer Vision Models in Machine Vision